Introduction:
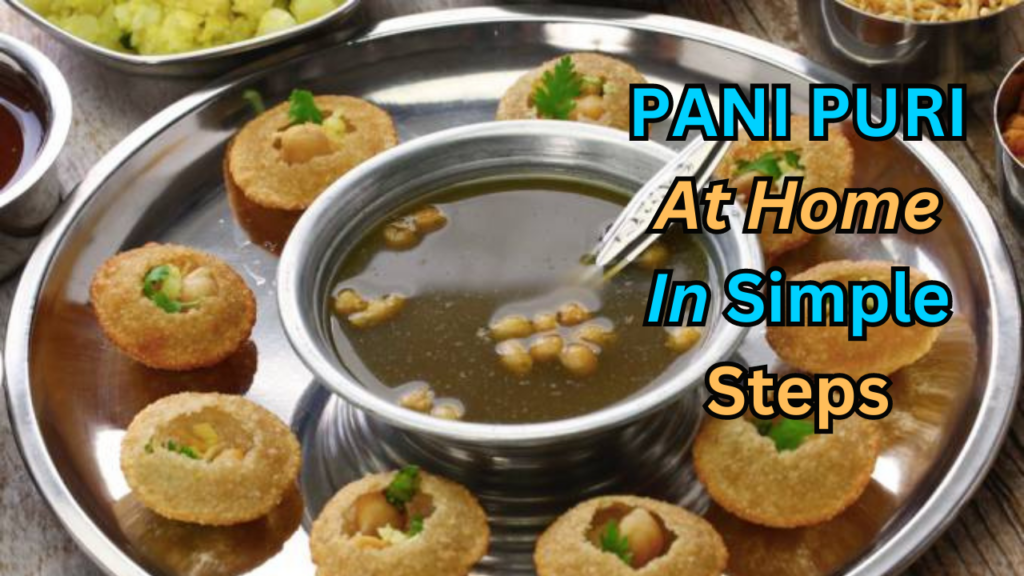
Pani Puri, also known as Golgappa or Puchka, is a popular Indian street food that has won hearts all over the country. It is a delightful and flavorful snack that combines crispy puris (hollow fried dough balls) with a tangy and spicy pani (water) and a delicious filling of mashed potatoes and chickpeas.
Pani Puri is not only a treat for the taste buds but also a fun and interactive eating experience. In this blog post, we will guide you through the step-by-step process of making Pani Puri at home, so you can enjoy this mouthwatering snack anytime you want.
About the Dish:
Pani Puri is believed to have originated in North India and has become a beloved street food across the country. It is a popular choice for snack time, parties, and festive occasions.
The dish is known for its burst of flavors, with the crispy puris providing a satisfying crunch, the tangy and spicy pani adding a refreshing kick, and the filling bringing a savory and creamy element to the mix. Pani Puri is not only delicious but also customizable, allowing you to adjust the flavors and spice levels according to your preference.(Let’s move forward…).
Ingredients: For the Puris:
- 1 cup semolina (sooji)
- 1/4 cup all-purpose flour (maida)
- Salt to taste
- Oil for deep frying
For the Pani (Water):
- 1/2 cup mint leaves
- 1/2 cup coriander leaves
- 1 green chili
- 1-inch piece of ginger
- 1 tablespoon tamarind pulp
- 1 teaspoon roasted cumin powder
- 1 teaspoon chaat masala
- 1/2 teaspoon black salt
- Salt to taste
- 4 cups chilled water
For the Filling:
- 2 medium potatoes, boiled and mashed
- 1/2 cup cooked chickpeas
- 1/2 teaspoon roasted cumin powder
- 1/2 teaspoon chaat masala
- Salt to taste
- Chopped coriander leaves for garnish
For Serving:
- Tamarind chutney
- Mint-coriander chutney
- Chopped onions
- Sev (crispy chickpea noodles)
Step-by-Step Instructions:
Step 1: Prepare the Puris
- In a mixing bowl, combine semolina, all-purpose flour, and salt.
- Gradually add water and knead the mixture into a stiff dough.
- Cover the dough and let it rest for 15-20 minutes.
- After resting, knead the dough again and divide it into small balls.
- Roll out each ball into thin circles.
- Heat oil in a deep pan for frying.
- Fry the rolled-out circles one at a time until they puff up and turn golden brown.
- Remove the puris from the oil and drain them on a paper towel.
Step 2: Prepare the Pani
- In a blender, add mint leaves, coriander leaves, green chili, ginger, tamarind pulp, roasted cumin powder, chaat masala, black salt, and salt.
- Blend until you get a smooth paste.
- Transfer the paste to a large bowl.
- Add chilled water and mix well.
- Adjust the flavors by adding more salt, tamarind pulp, or spices according to your taste.
- Chill the pani in the refrigerator until ready to serve.
Step 3: Prepare the Filling (continued):
- In a bowl, mix mashed potatoes, cooked chickpeas, roasted cumin powder, chaat masala, and salt.
- Adjust the seasoning to your taste.
- Add some chopped coriander leaves and mix well.
Step 4: Assemble the Pani Puri:
- Take a puri and gently make a small hole in the center using your thumb or finger.
- Fill the puri with a spoonful of the prepared filling.
- Drizzle some tamarind chutney and mint-coriander chutney over the filling.
- Top it off with some chopped onions and sev for added crunch and flavor.
Step 5: Serve and Enjoy:
- Place the prepared Pani Puris on a serving platter.
- Pour a generous amount of the chilled pani into each puri just before eating.
- Pop the whole Pani Puri into your mouth and savor the burst of flavors.
- Repeat the process and enjoy the remaining Pani Puris.
Recipe Card:
| PANI PURI | | Servings: 4-6 |
Ingredients: For the Puris:
- 1 cup semolina (sooji)
- 1/4 cup all-purpose flour (maida)
- Salt to taste
- Oil for deep frying
For the Pani (Water):
- 1/2 cup mint leaves
- 1/2 cup coriander leaves
- 1 green chili
- 1-inch piece of ginger
- 1 tablespoon tamarind pulp
- 1 teaspoon roasted cumin powder
- 1 teaspoon chaat masala
- 1/2 teaspoon black salt
- Salt to taste
- 4 cups chilled water
For the Filling:
- 2 medium potatoes, boiled and mashed
- 1/2 cup cooked chickpeas
- 1/2 teaspoon roasted cumin powder
- 1/2 teaspoon chaat masala
- Salt to taste
- Chopped coriander leaves for garnish
For Serving:
- Tamarind chutney
- Mint-coriander chutney
- Chopped onions
- Sev (crispy chickpea noodles)
Instructions:
- In a mixing bowl, combine semolina, all-purpose flour, and salt. Gradually add water and knead the mixture into a stiff dough. Cover and let it rest for 15-20 minutes. After resting, knead the dough again and divide it into small balls. Roll out each ball into thin circles. Heat oil in a deep pan for frying. Fry the rolled-out circles one at a time until they puff up and turn golden brown. Remove the puris from the oil and drain them on a paper towel.
- In a blender, add mint leaves, coriander leaves, green chili, ginger, tamarind pulp, roasted cumin powder, chaat masala, black salt, and salt. Blend until you get a smooth paste. Transfer the paste to a large bowl. Add chilled water and mix well. Adjust the flavors by adding more salt, tamarind pulp, or spices according to your taste. Chill the pani in the refrigerator until ready to serve.
- In a bowl, mix mashed potatoes, cooked chickpeas, roasted cumin powder, chaat masala, and salt. Adjust the seasoning to your taste. Add some chopped coriander leaves and mix well.
- Take a puri and gently make a small hole in the center using your thumb or finger. Fill the puri with a spoonful of the
- prepared filling. Drizzle some tamarind chutney and mint-coriander chutney over the filling, according to your preference. Top it off with some chopped onions and sev for added texture and flavor.
- Place the assembled Pani Puris on a serving platter and repeat the process with the remaining puris.
- Serve the Pani Puris immediately and encourage everyone to enjoy them in one bite. The combination of crispy puri, tangy pani, and flavorful filling creates an explosion of taste in your mouth.
- Conclusion:
- Making Pani Puri at home is a delightful experience that allows you to recreate the flavors of this beloved street food in the comfort of your own kitchen. With its crispy puris, tangy pani, and delectable filling, Pani Puri is a crowd-pleaser and a favorite snack for all ages. By following this step-by-step guide, you can prepare Pani Puri that rivals the ones found at street stalls. So gather your family and friends, indulge in the joy of assembling and savoring each bite, and create lasting memories around this iconic Indian snack.(Let’s move forward…).
FAQs:
Q: Can I make the puris and pani in advance?
A: Yes, you can prepare the puris a day in advance and store them in an airtight container. The pani can be made a few hours ahead and refrigerated. Just make sure to assemble the Pani Puris just before serving to maintain their freshness and crispiness.
Q: Can I customize the filling?
A: Absolutely! The filling can be personalized according to your taste. You can add boiled moong sprouts, grated carrots, or even sweet chutney to enhance the flavors and textures.
Q: Is it necessary to use tamarind pulp in the pani?
A: Tamarind pulp adds a tangy flavor to the pani, but if you don’t have it, you can substitute it with lemon juice. Adjust the quantity according to your taste preference.
Q: Can I make Pani Puri without frying the puris?
A: If you prefer a healthier version, you can opt for baked puris or use store-bought baked or roasted puris.
Q: Can I store the leftover pani and filling?
A: The pani is best consumed fresh. However, you can refrigerate the leftover filling in an airtight container for up to 2 days and use it for other snacks like chaat or sandwiches.